In this tutorial, we will create a simple mashup application to illustrate how to use the Discngine Connector Client Automation API. The application will be served by a minimal Node.js server.
Installing dependencies
Before starting, make sure you have Node.js and npm installed. The following example was built using node v10.16.0 and npm 6.14.5.
Obviously, you will also need to have the Discngine Connector packages installed on your TIBCO Spotfire® server. Make sure your account is in a group that has access to the Discngine Connector packages, and that you load the correct deployment area.
Writing the app
First let's create a new folder for our application.
$ mkdir client_automation_example && cd client_automation_example
In this directory, create an index.js file which will contain our basic server.
Create an api folder and place the Discngine Connector Javascript api file in it.
Finally, create an app.js file and an index.html file for our home page in the public
folder, which will contain the front-end app.

Now let's start writing the code.
Node.js server
Our server will only serve three routes:
/which will be the aplication root/api/Discngine-Connector-js-api.jswhich will load the Discngine Connector Javascript API/public/app.jswhich will load the application main file
All other routes will return a 404 error.
// index.js
var http = require('http');
var fs = require('fs');
var path = require('path');

var PORT = 3002;

var server = http.createServer((req, res) => {
  if (req.url === '/') {
    return fs.readFile(path.resolve(`${__dirname}/index.html`), (err, data) => {
      if (err) {
        res.writeHead(404);
        res.end(JSON.stringify(err));
        return;
      }

      res.setHeader('Content-Type', 'text/html');
      res.writeHead(200);
      res.end(data);
    });
  }

  if (req.url === '/api/Discngine-Connector-js-api.js' || req.url === '/public/app.js') {
    return fs.readFile(
      path.resolve(`${__dirname}${req.url}`),
      function(err, data) {
        if (err) {
          res.writeHead(404);
          res.end(JSON.stringify(err));
          return;
        }

        res.setHeader('Content-Type', 'application/javascript');
        res.writeHead(200);
        res.end(data);
      }
    );
  }

  res.writeHead(404);
  res.end('Path not found');
});

server.listen(PORT, () => {
  console.log(`-- ${new Date().toISOString()}`);
  console.log(`-- server running at http://localhost:${PORT}`);
});
Front-end app
HTML file
The HTML file will first import the javascript API with a simple script tag <script src="api/Discngine-Connector-js-api.js"></script>, matching the route defined earlier on the server.
It will also load our app script. In our example it will be simple, but you could use any fancy framework instead, like React, Svelte, Angular or Vue;
// index.html
<!DOCTYPE html>
<html lang="en">

  <head>
    <meta charset="UTF-8">
    <!-- Required in Analyst to ensure compatibility with latest web features -->
    <meta http-equiv="X-UA-Compatible" content="IE=11">
    <title>Example Discngine Connector Application</title>
    <script src="api/Discngine-Connector-js-api.js"></script>
    <script src="public/app.js"></script>
    <style>
      * {
        font-family: Roboto, sans-serif;
        box-sizing: border-box;
      }

      body {
        margin: 0;
      }
    </style>
  </head>


  <body>
  </body>

</html>
In the body, we simply put two <div>s: one will contain our app while the other will be the target to instanciate Spotfire Web Player context. The latter will be hidden in Analyst since Spotfire context will be available in the environment.
// index.html
<!DOCTYPE html>
<html lang="en">

  <head>
    <meta charset="UTF-8">
    <!-- Required in Analyst to ensure compatibility with latest web features -->
    <meta http-equiv="X-UA-Compatible" content="IE=11">
    <title>Example Discngine Connector Application</title>
    <script src="api/Discngine-Connector-js-api.js"></script>
    <script src="public/app.js"></script>
    <style>
      * {
        font-family: Roboto, sans-serif;
        box-sizing: border-box;
      }

      body {
        margin: 0;
      }
    </style>
  </head>


  <body>
    <div style="float: left; width: 25%; height: 100vh; padding: 16px;" id="app-root">
      <h1>Welcome to the Discngine Connector Example app.</h1>
    </div>
    <div style="float: left; width: 75%; height: 100vh" id="spotfire-container"></div>
  </body>

</html>
In the "app" div, we will insert the logic for our basic app. First, let's put a button which will trigger the loading of our data.
// index.html
<!DOCTYPE html>
<html lang="en">

  <head>
    <meta charset="UTF-8">
    <!-- Required in Analyst to ensure compatibility with latest web features -->
    <meta http-equiv="X-UA-Compatible" content="IE=11">
    <title>Example Discngine Connector Application</title>
    <script src="api/Discngine-Connector-js-api.js"></script>
    <script src="public/app.js"></script>
    <style>
      * {
        font-family: Roboto, sans-serif;
        box-sizing: border-box;
      }

      body {
        margin: 0;
      }
    </style>
  </head>


  <body>
    <div style="float: left; width: 25%; height: 100vh; padding: 16px;" id="app-root">
      <h1>Welcome to the Discngine Connector Example app.</h1>
      <button id="load-data">Load Data File</button>
    </div>
    <div style="float: left; width: 75%; height: 100vh" id="spotfire-container"></div>
  </body>

</html>
Now let's implement the logic in the app.js file.
Javascript file
We want to instanciate the Discngine Connector mashup on page load, once the DOM has been fully loaded. This can be achieved by adding a DOMContentLoaded event listener to the document, which will call a onDocumentReady callback.
var spotfireDocument = null;

document.addEventListener('DOMContentLoaded', onDocumentReady);
In the onDocumentReady callback, we will do two things:
- update the display based on whether we are in Analyst or Web Player
- use the provided
instanciateSpotfireDocumentAsyncfunction of the Discngine Connector API to create ourspotfireDocumentinstance.
Update page display
Because our app will run both in Analyst and Web Player, we need to take that into account when writing our code. The two environments are built slightly differently. In Analyst, we open the Discngine Connector Panel (our browser) into a TIBCO Spotfire® Document. In the Web Player, it is the other way around. We load the TIBCO Spotfire® Web Player into a div in our app. This is why in our HTML file we have two divs: the #app-root one and the #spotfire-container one.
When running in Analyst, the div#spotfire-container is useless and we want the #app-root one to take up all space. We will do that with a small javascript snippet.
var spotfireDocument = null;

document.addEventListener('DOMContentLoaded', onDocumentReady);

function onDocumentReady() {
  if(SpotfireDocument.isAnalyst()) {
    document.getElementById('app-root').style.width = '100%';

    var spotfireContainer = document.getElementById('spotfire-container')
    spotfireContainer.parentElement.removeChild(spotfireContainer);
  }
}
Instanciate spotfireDocument object
Secondly, we use the instanciateSpotfireDocumentAsync to create our SpotfireDocument instance.
var spotfireDocument = null;

document.addEventListener('DOMContentLoaded', onDocumentReady);

function onDocumentReady() {
  if(SpotfireDocument.isAnalyst()) {
    document.getElementById('app-root').style.width = '100%';

    var spotfireContainer = document.getElementById('spotfire-container')
    spotfireContainer.parentElement.removeChild(spotfireContainer);
  }

  window
    .instanciateSpotfireDocumentAsync(
      'https://spotfire.yourcompany.com/spotfire/wp', // Your spotfire server url
      '/Discngine/empty', // The document you want to open by default in Web Player (required for Web Player),
      function(err) {
        if (err) {
          console.log('Error when loading Discngine Connector API', err);
        }
      }
    ).then(function(spotfireDoc) {
      spotfireDocument = spotfireDoc; // Save reference for future use
    });
}
Now we have our spotfireDocument instance created, we can use it to interact with TIBCO Spotfire®.
We will first load a Data Table from a server into our Spotfire document. We already have our Load Data File button in the HTML, let's simply add the corresponding event listener.
For our tutorial, we will use a simple CSV file containing ChEMBL data for ibuprofen compounds which has been placed in the Discngine Connector documentation site at https://docs.spiceup.ax/assets/ChEMBL-ibuprofen.csv.
var spotfireDocument = null;

document.addEventListener('DOMContentLoaded', onDocumentReady);

function onDocumentReady() {
  if(SpotfireDocument.isAnalyst()) {
    document.getElementById('app-root').style.width = '100%';

    var spotfireContainer = document.getElementById('spotfire-container')
    spotfireContainer.parentElement.removeChild(spotfireContainer);
  }

  window
    .instanciateSpotfireDocumentAsync(
      'https://spotfire.yourcompany.com/spotfire/wp', // Your spotfire server url
      '/Discngine/empty', // The document you want to open by default in Web Player (required for Web Player),
      function(err) {
        if (err) {
          console.log('Error when loading Discngine Connector API', err);
        }
      }
    ).then(function(spotfireDoc) {
      spotfireDocument = spotfireDoc; // Save reference for future use
    });

  document.getElementById('load-data').addEventListener('click', loadDataTable);
}

function loadDataTable() {
  if (!spotfireDocument) {
    console.warn('Spotfire Document not yet initialized.')
    return;
  }

  spotfireDocument.editor
    .loadDataTableFromUrl(
      'Demo',
      'https://docs.spiceup.ax/assets/ChEMBL-ibuprofen.csv'
    )
    .addTable()
    .applyState();
}
Let's break down what we just wrote.
- The
spotfireDocumentinstance exposes a member instance of SpotfireDocumentEditor. This can be used to update the actual Spotfire Document.
SpotfireDocument is used mainly for reading or extracting information from the Document. The class
SpotfireDocumentEditor is used mainly for modifying the Document.- We call the
loadDataTableFromUrlof the SpotfireDocumentEditor instance to load the data remotely into a Data Table called Demo. - We add a Table plot using the
addTablemethod. - Finally we call the
applyStatemethod to commit all the modifications to the Document.
applyState or applyStateAsync method.This is of higher importance so we will insist on it: all the methods you call on the SpotfireDocumentEditor instance are not applied until applyState or applyStateAsync methods are called.
The SpotfireDocumentEditor object works as a buffer of actions. Every action you add is pushed to the stack but not applied to the document. When you call applyState or applyStateAsync, the actions stack
is applied to the document and then flushed. This means that the SpotfireDocumentEditor is not a representation of the actual Spotfire Document. The advantage is that all the stacked actions are applied
at once, preventing unnecessary update of the Spotfire Document and providing better user experience.
Launching the app
Let's now try our app. Open your shell and start the node server:
~/path/to/client_automation_example/ $ node index.js
You should see a message:
-- 2020-08-27T16:02:02.996Z
-- server running at http://localhost:3002
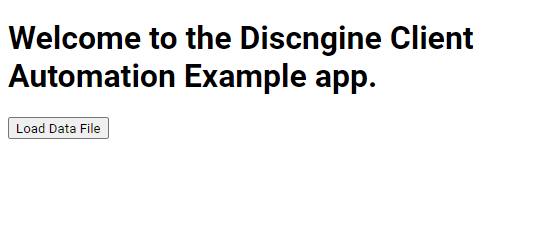
Open your browser and go to http://localhost:3002. You will see our demo app loaded.
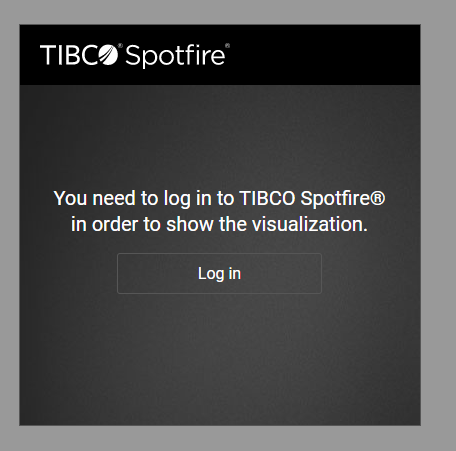
You might also be prompted to log in to your TIBCO Spotfire® server.
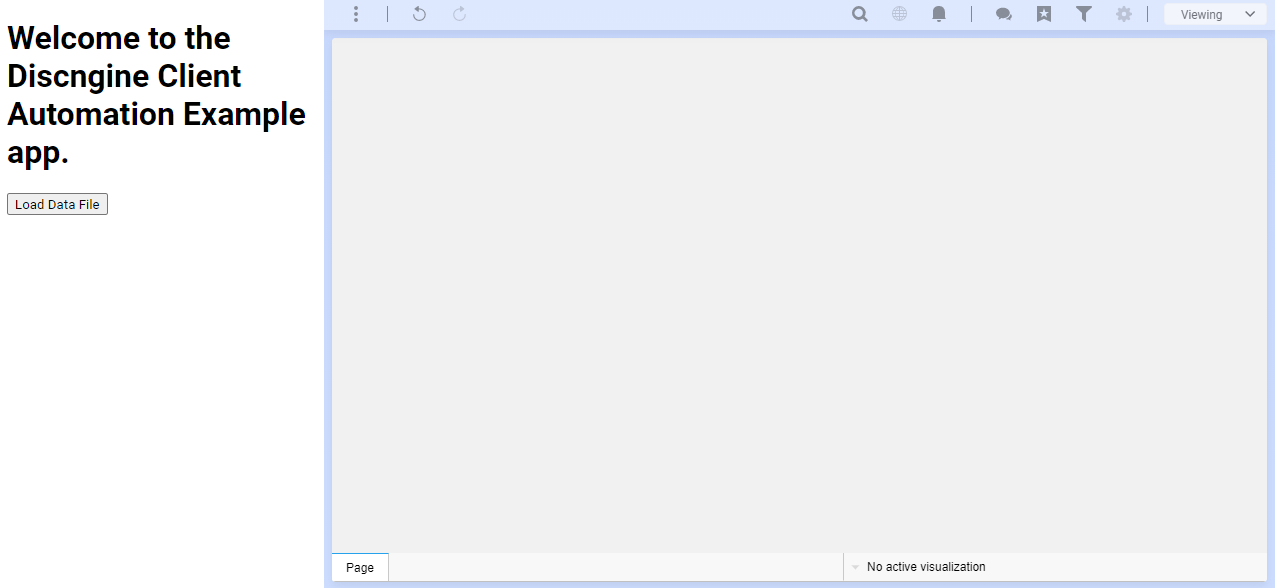
Once done, you will see the mashup application with the TIBCO Spotfire® view on the right.
Loading data
Web Player
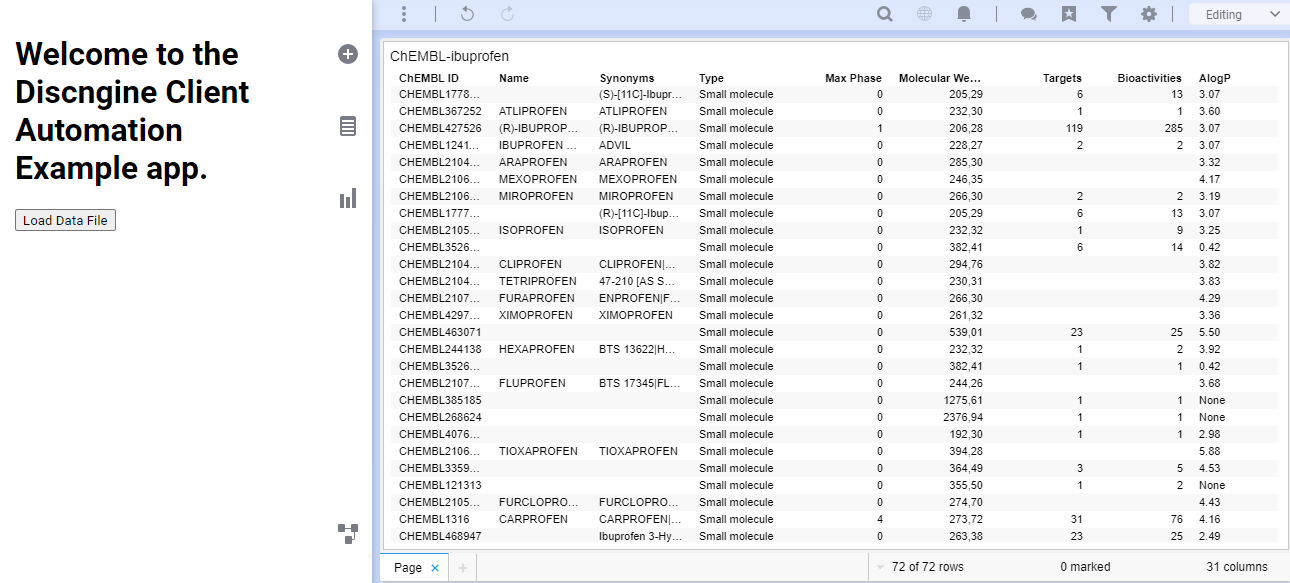
Now that our app is up and running, we can use the interactivity provided by Discngine Connector to load our data. Click on the "Load Data File" button we created earlier to load the example data file into TIBCO Spotfire®. After a few seconds, the csv file will be loaded, and you will end up with ibuprofen data in the Table Plot.
Analyst
One of the main features of the Discngine Connector JS API is that it works the same in Analyst and Web Player. Thus, if we open an Analyst document and point the Discngine Connector Panel to our server (in our case http://localhost:3002) we will see the same "Load Data File" button which will do exactly the same.
On the HTML side, the appearance is also similar thanks to the little tweak we did earlier.
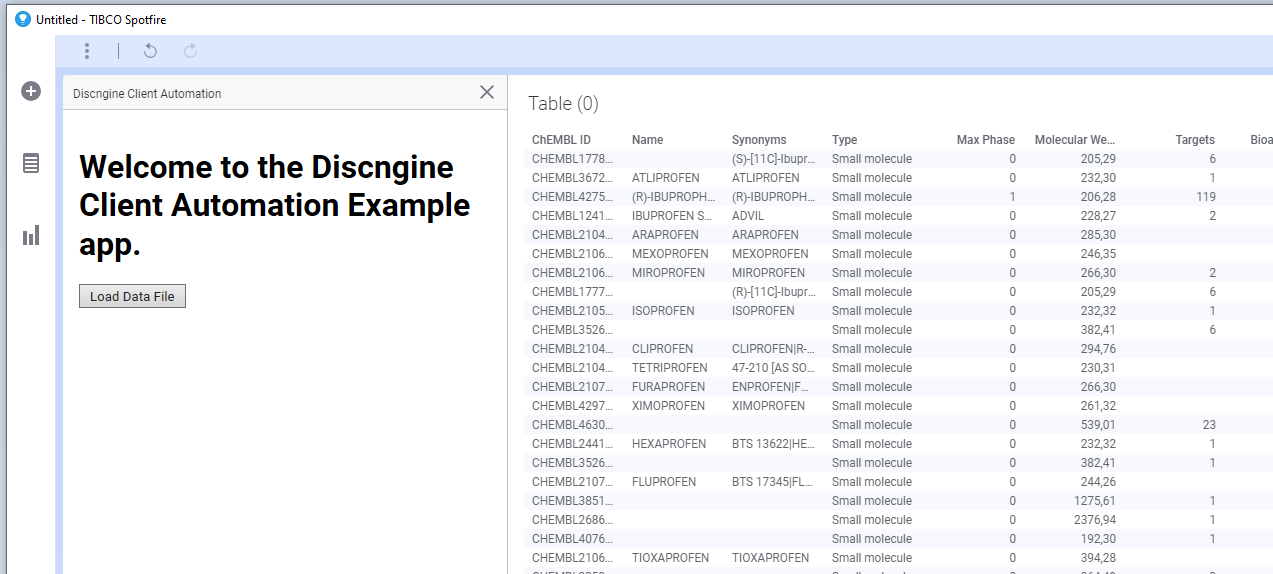
Our demo app opened in TIBCO Spotfire® Analyst
Adding interactivity
Discngine Connector provides ways to load data but also to interact with it. To exemplify that we will add a listener which will display the average values of the marked rows.
HTML file
The modification in the HTML file is fairly simple. We add a <div> with an id statistics-output which we will be able to modify programmatically.
// index.html
<!DOCTYPE html>
<html lang="en">

  <head>
    <meta charset="UTF-8">
    <!-- Required in Analyst to ensure compatibility with latest web features -->
    <meta http-equiv="X-UA-Compatible" content="IE=11">
    <title>Example Discngine Connector Application</title>
    <script src="api/Discngine-Connector-js-api.js"></script>
    <script src="public/app.js"></script>
    <style>
      * {
        font-family: Roboto, sans-serif;
        box-sizing: border-box;
      }

      body {
        margin: 0;
      }
    </style>
  </head>


  <body>
    <div style="float: left; width: 25%; height: 100vh; padding: 16px;" id="app-root">
      <h1>Welcome to the Discngine Connector Example app.</h1>
      <button id="load-data">Load Data File</button>
      <div id="statistics-output" style="margin-top: 16px">Select rows to view statistics</div>
    </div>
    <div style="float: left; width: 75%; height: 100vh" id="spotfire-container"></div>
  </body>

</html>
Javascript file
Most of the work has to be done in the javascript part. We need to call the onMarkingChanged method of the spotfireDocument object, to which we will pass our callback.
We could very well add the listener right after instanciating the spotfireDocument, but here we will put it after the Data Table has been loaded. To do so we need to replace the applyState method by the applyStateAsync method to allow chaining.
var spotfireDocument = null;

document.addEventListener('DOMContentLoaded', onDocumentReady);

function onDocumentReady() {
  if(SpotfireDocument.isAnalyst()) {
    document.getElementById('app-root').style.width = '100%';

    var spotfireContainer = document.getElementById('spotfire-container')
    spotfireContainer.parentElement.removeChild(spotfireContainer);
  }

  window
    .instanciateSpotfireDocumentAsync(
      'https://spotfire.yourcompany.com/spotfire/wp', // Your spotfire server url
      '/Discngine/empty', // The document you want to open by default in Web Player (required for Web Player),
      function(err) {
        if (err) {
          console.log('Error when loading Discngine Connector API', err);
        }
      }
    ).then(function(spotfireDoc) {
      spotfireDocument = spotfireDoc; // Save reference for future use
    });

  document.getElementById('load-data').addEventListener('click', loadDataTable);
}

function loadDataTable() {
  if (!spotfireDocument) {
    console.warn('Spotfire Document not yet initialized.')
    return;
  }

  spotfireDocument.editor
    .loadDataTableFromUrl(
      'Demo',
      'https://docs.spiceup.ax/assets/ChEMBL-ibuprofen.csv'
    )
    .addTable()
    .applyState();
    .applyStateAsync()
    .then(function() {
      spotfireDocument.onMarkingChanged('Marking', 'Demo', updateStatistics)
    });
}

function updateStatistics(selectedRows) {
  // Display Results
}
Note how we replaced applyState by applyStateAsync and only after we added the event listener in the .then callback.
Now that we have our listener ready, let's write the handler. It will simply create a table containing the average values for each numerical column.
var spotfireDocument = null;

document.addEventListener('DOMContentLoaded', onDocumentReady);

function onDocumentReady() {
  if(SpotfireDocument.isAnalyst()) {
    document.getElementById('app-root').style.width = '100%';

    var spotfireContainer = document.getElementById('spotfire-container')
    spotfireContainer.parentElement.removeChild(spotfireContainer);
  }

  window
    .instanciateSpotfireDocumentAsync(
      'https://spotfire.yourcompany.com/spotfire/wp', // Your spotfire server url
      '/Discngine/empty', // The document you want to open by default in Web Player (required for Web Player),
      function(err) {
        if (err) {
          console.log('Error when loading Discngine Connector API', err);
        }
      }
    ).then(function(spotfireDoc) {
      spotfireDocument = spotfireDoc; // Save reference for future use
    });

  document.getElementById('load-data').addEventListener('click', loadDataTable);
}

function loadDataTable() {
  if (!spotfireDocument) {
    console.warn('Spotfire Document not yet initialized.')
    return;
  }

  spotfireDocument.editor
    .loadDataTableFromUrl(
      'Demo',
      'https://docs.spiceup.ax/assets/ChEMBL-ibuprofen.csv'
    )
    .addTable()
    .applyState();
    .applyStateAsync()
    .then(function() {
      spotfireDocument.onMarkingChanged('Marking', 'Demo', updateStatistics)
    });
}

function updateStatistics(selectedRows) {
  // `selectedRows` is an object with keys being the name of columns and values being an array of selected rows values

  // Display default message if no rows selected
  if (Object.values(selectedRows)[0].length === 0){
    document.getElementById('statistics-output').innerHTML = "Select rows to view statistics"
  }

  var outputContent = '<table>';

  Object.entries(selectedRows).forEach(function(entry) {
    var colName = entry[0]; // string, name of column
    var selectedValues = entry[1] // Array of values

    // Only treat columns which contains numerical values
    if (!Number.isNaN(parseFloat(selectedValues[0]))) {
      var numValues = 0;
      var total = selectedValues.reduce(function(acc, value) {
        var numericalValue = parseFloat(value);

        if (!Number.isNaN(numericalValue)) {
          numValues += 1;
          return acc + numericalValue
        }

        return acc;
      }, 0);

      outputContent += '<tr>';
      outputContent += '<td>' + colName + '</td>';
      outputContent += '<td>' + (numValues> 0 ? (total / numValues).toFixed(2) : 'N/A') + '</td>';
      outputContent += '<td>' + numValues + ' values' + '</td>';
      outputContent += '</tr>';
    }
  })

  outputContent += '</table>';
  document.getElementById('statistics-output').innerHTML = outputContent
}
That's it. Now when you load your table, the listener will be registered and the statistics of the rows will be displayed in the application.
Conclusion
You are now ready to take advantage of Discngine Connector ability to control, read and update your TIBCO Spotfire® Document, both in Analyst and Web Player. Our example app is fairly simple, but it showcases how you can load and read data from the TIBCO Spotfire® Document.
With all your business knowledge, you will surely find other ways to use these functionalities to drive your analysis further and help your users take full advantage of a modern application coupled with TIBCO Spotfire®.
The SWAPP is an example of what can be achieved. It's a Single Page Application which uses the Discngine Connector JS API and was built with React. Then again, any modern Javascript framework like Svelte, Angular or Vue can be used.
Couple that with a python server in Flask for example and you will be able to use modern Machine Learning algorithm to build powerfull tools for your business.
Happy coding!